anile_eight
Go Kart Champion
- Location
- Savannah, GA
I had the car up the other weekend and noticed my driver side rear wheels not spinning for more than 1 rotation... So i decided to adjust the parking brake.
As always with any DIY I am not responsible for any damage that may result to you or your car. So don't come back to me blaming me for damage... unless i physically kicked your car then you're more than welcome to.
I was in the middle of physically adjusting the parking brake with my wrench when i realized I should make up a diy as I did not find any and this seems to be common that VWs come with a tighter than normal e-brake. So i took pictures of the reassembly haha. Anyways lets being.
You will need a T-20, a 10mm wrench and a jack/jacks stands. (oh and a 1/4" socket and drive to make your life easier)
If i missed something please let me know!
As always with any DIY I am not responsible for any damage that may result to you or your car. So don't come back to me blaming me for damage... unless i physically kicked your car then you're more than welcome to.
I was in the middle of physically adjusting the parking brake with my wrench when i realized I should make up a diy as I did not find any and this seems to be common that VWs come with a tighter than normal e-brake. So i took pictures of the reassembly haha. Anyways lets being.
You will need a T-20, a 10mm wrench and a jack/jacks stands. (oh and a 1/4" socket and drive to make your life easier)
- First off start by taking off the rear vent. It doesn't just pull off you'll need some force behind it. I found it easiest to start from the top and pull it from there. Careful to not brake it! Reassemble the same way by starting from the top.
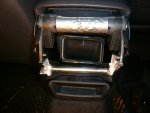
Why there is duct tape on there I have not clue this is the first time i've ever take the vent off... If anyone else has it i guess it was factory, but I highly doubt that lol
- Undo the 2 screws
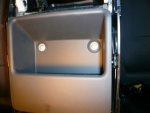
- Take the 4 screws out you see circled. I found it easiest if you use the 1/4" socket and drive here and just put the torx bit in it. At least for me the screw driver was too long here.
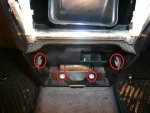
- Clean out the inside of the console and pull out the vent where that little seam is. It is really easy to get out.
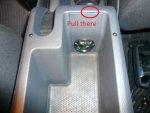
- Then pull out the rubber mat. Undo the screw shown.
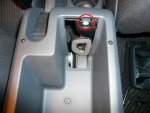
- Now the console cover can come off. Be careful when you are taking it off the 12V plug is still connected. I found it easiest if you reach from the bottom (cup holder side) and unplug it from there. My hand was too big to go through the top. Also it is easier if you have the parking brake a couple clicks up as it is easier to rotate the console cover up.
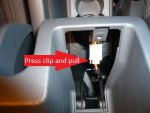
- Now you can take the screw out on the drivers side. This is easily done from the top. Be careful when putting the screw back in! It can be tricky! To make the next screw easier to access pull the air vent running through the middle straight up. The first time I did this I cut my knuckles pretty bad so be cautious. It takes a good amount of force to do it as there is a clip at the bottom.
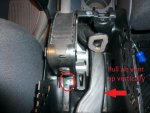
- Take this screw out up at the front next to the handle behind the cup holders
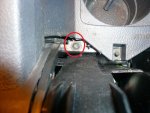
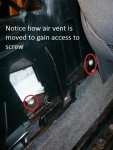
- I found the next part easiest if you move the passenger seat forward all the way and jack the seat up all the way with the handle by the door. This gives you better access to the screw up front. Undo these screws. With the air vent pushed to one side you can get access from the top it may still be tricky.
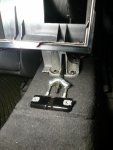
- After that you are ready to adjust the parking brake. I used my light to prop the console shell up to make it easier. Loosen it off a little. I mean A LITTLE. I went 2 entire rotations and that was enough. Make sure to not go too far. What the actual distance should be I have no clue someone can chime in and let everyone else know. I jacked the car up to test how the wheels rotated, I would suggest the same. Listen for the rubbing of the brakes.
- TEST DRIVE. Make sure you can still brake adequately and by the 3rd click (4th is okay too) you should noticeably be slowing down. How you adjust it is up to you I am not telling how much to adjust it but make sure there is no slack in the cable or on the parking brake handle.
- Reassemble. This was a little tricky... I started with the front passenger side screw and then the one behind it (Step 9). You will need to align those with some force as it took me a couple tries. Make sure to put all the screws back in and plug the 12V in. Beyond that it is pretty straight forward. Good luck!
If i missed something please let me know!
Last edited: